Why Your Water Heater Deserves Annual Attention
Your water heater quietly runs every single day - heating water for showers, dishes, and laundry - yet most homeowners don't think about it until something goes wrong. That neglect adds up. Sediment builds inside the tank, protective components degrade, and what could have been a $20 fix becomes a $1,200 replacement.
The good news: a small amount of maintenance once or twice a year extends the typical 8-12 year lifespan of a tank water heater significantly. These aren't complicated tasks. Most require only a garden hose, a socket wrench, and about an hour of your time. For a broader look at where water heater care fits into your overall upkeep schedule, see the quarterly home maintenance checklist.
The Core Practices That Protect Your Tank
The following practices address the most common causes of water heater failure - sediment buildup, anode rod depletion, unsafe pressure, and inefficient temperature settings. Build these into your annual home maintenance routine.
Flush the tank annually to remove sediment buildup
Minerals in tap water - especially calcium and magnesium - settle at the bottom of your tank over time. This sediment layer insulates the water from the heating element, forcing the unit to work harder and shortening its lifespan. In areas with hard water, buildup can become significant within a single year.
Inspect and replace the anode rod every 2-3 years
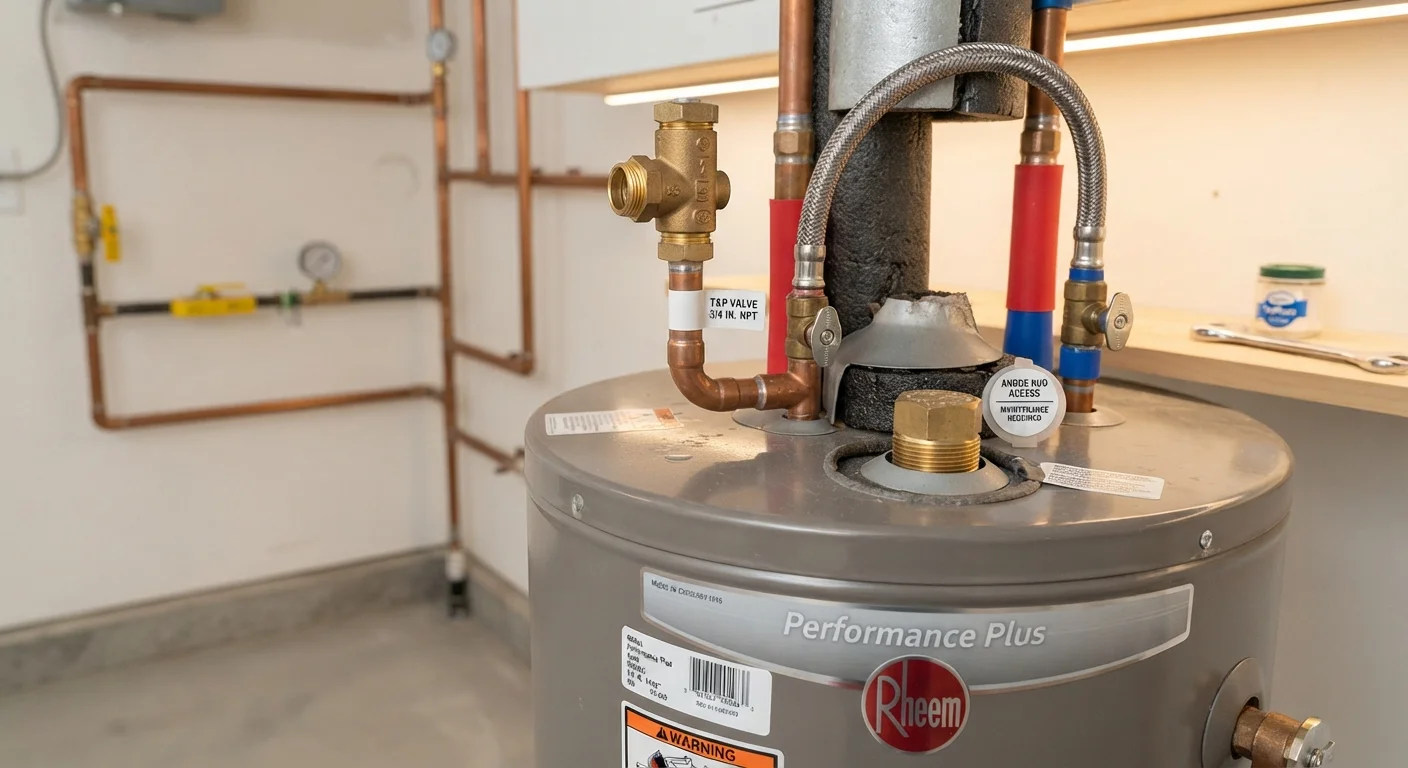
The anode rod - usually made of magnesium or aluminum - sacrificially corrodes so your tank doesn't. Once it's depleted, the tank wall itself begins to rust from the inside out, leading to leaks that are not repairable. Replacing a spent rod costs roughly $20-$50 and is one of the most cost-effective maintenance tasks you can perform.
Test the temperature and pressure relief (T&P) valve each year
The T&P valve is a critical safety device designed to release pressure if the tank overheats or overpressurizes. A valve that seizes in the closed position is a serious safety hazard. Testing it only takes seconds and ensures it will function when needed.
Set the thermostat to 120°F (49°C)
Many water heaters ship from the factory set at 140°F, which wastes energy and creates a scalding risk, particularly for households with young children or elderly residents. The U.S. Department of Energy recommends 120°F as the optimal balance between efficiency, safety, and preventing bacterial growth like Legionella.
Insulate older tanks and pipes to reduce standby heat loss
Tank water heaters continuously lose heat through their walls - a phenomenon called standby heat loss. Older units (pre-2004) generally have less built-in insulation than current models. Adding an insulating jacket and insulating the first few feet of hot- and cold-water pipes can meaningfully reduce energy use.
Unfamiliar with any of the terminology above? The home maintenance terms reference covers concepts like pressure relief valves and anode rods in plain language.
Quick Wins You Can Do This Weekend
Not ready to tackle a full flush or anode rod inspection today? These smaller actions still make a real difference and require almost no tools or technical knowledge.
18%
Share of home energy use from water heating
According to the U.S. Department of Energy, water heating typically accounts for about 18% of a home's total energy consumption, making it the second-largest energy expense in most households.
8-12 years
Average tank water heater lifespan
Industry sources including the International Association of Certified Home Inspectors cite 8-12 years as the typical range, with proper maintenance pushing results toward the upper end.
If you're also rethinking other plumbing habits around your home, it's worth reading up on common plumbing myths that quietly cost homeowners money.
This article is for general informational purposes only. For any work involving gas lines, electrical connections, or structural modifications to your water heater installation, consult a licensed plumber or HVAC professional and verify local permit requirements before proceeding.